Staging of material
The majority of paver projects will differ depending on gain access to, site conditions, task size and obviously, the weather condition. These circumstances can have a total effect on your task from a timing stand point. Mindful consideration should be required to figure out the time to start the paver installation. Constantly try to lessen or avoid any traffic on the ready areas.
The supervisor or job supervisor should constantly have the materials (sand/ pavers) distributed around the task site for simple and efficient installations. Paver pallets/bundles need to be placed in a way not to interfere with the paver installation. The appropriate pallet/bundle placement can make the real project installation much easier and quicker by reducing the general labor of managing the material.
Brick paver patterns
Pavers can be positioned in various patterns depending upon their shape. Each paver shape will typically have numerous different hatch patterns that are offered by the maker.
Contractors need to take into factor to consider the traffic weight loads on their paver tasks. In many applications around the world, it has been revealed that pavers laid in a herringbone pattern have actually performed properly.
Pavers that are 60 mm (2 - 3/8 in) density are suitable for pedestrian applications. Pavers that are going to be used in industrial or industrial applications must be 80 mm (3 - 1/8 in) in density.
Reference/starting point for brick paver installation
There are a number of conditions that identify the beginning point of a paver task.
When beginning to install pavers it is best to snap a true straight chalk line on the surface of the bedding sand or pull a real straight string line above the surface area of the bed linen sand at the finished elevation of the pavers This will help as a guide for preserving straight joint lines and will also allow the installer to make modifications in the positioning of the pavers.
Structures and concrete suppressing are generally not straight and ought to not be used for developing straight joint lines. The use of string lines is vital to figure out the real straightness of the edge. As the paver installation progresses, the string lines will help reduce the need for little trim pieces.
Joint width in between pavers need to be in between 1/16 and 3/16 in (2 and 5 mm ). There are some pavers with spacer bars on their sides. These will maintain a minimum joint width and allow the bedding and jointing sand to go into in between each paver. Pavers with spacer bars are normally not laid in snug versus each other since a string line will provide consistent joint spacing.
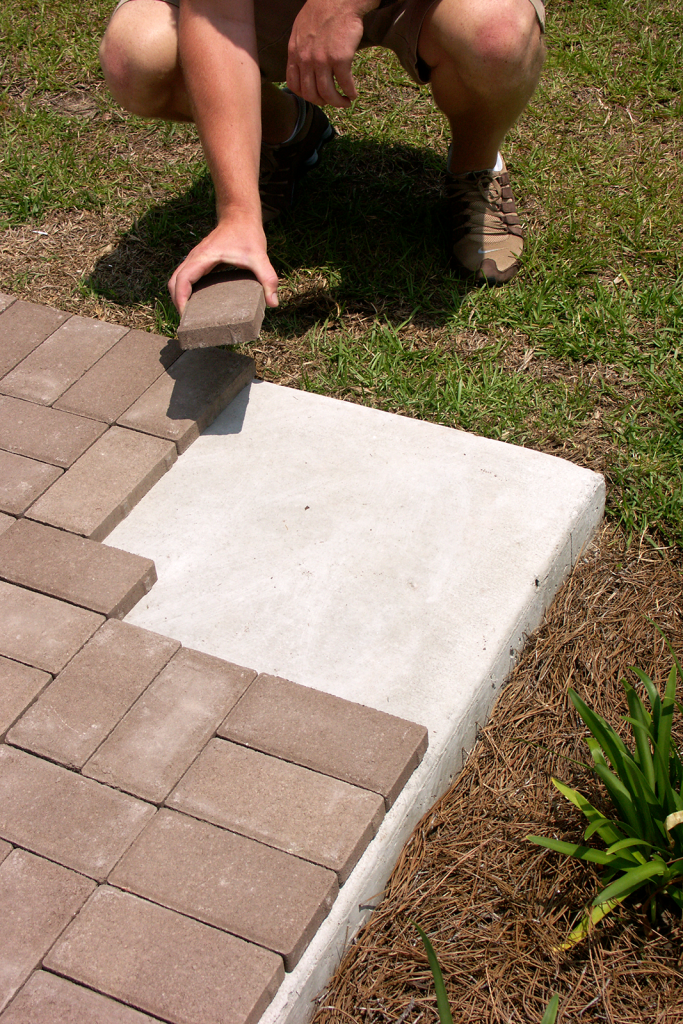
Installation of brick pavers.
One of the most widely utilized approaches for the installation of pavers is hand installation of each paver. It is best to set up a single row of pavers along one of the real straight lines that you have actually pulled or above the bed linen sand. The finest approach is to put a paver versus another one and let it move down into the bedding sand.
When installing pavers on a steep grade, they should be installed at the base of the grade going uphill. This will prevent the pavers from creeping as they are being laid.
On large commercial and commercial applications, hand laying pavers would not be cost effective due to the labor strength. The very best method for setting up pavers on large jobs is to install them mechanically. The use of a mechanical laying device can set up roughly 6000 - 7000 sq ft a day. There are a couple items a contractor should consider prior to setting up Koi Pond Florida pavers mechanically:
1.) Mechanical installers are only capable of setting up pavers in particular patterns.
2.) The specialist should ensure that the manufacturer is capable of production and bundling pavers in the wanted pattern on the pallets for simple mechanical installation.
3.) Professionals may encounter a color mixing scenario coming off the bundles of pavers Poor color blending could result in a patchy looking installation. The majority of makers follow color blending on each bundle of pavers, however it is the professional's obligation to ensure proper mixing in the field.
Cutting procedures for brick pavers.
Professionals typically have 2 ways of cutting pavers. When cutting pavers damp, it will assist reduce dust and will lengthen the diamond blades life. The operator of the brick saw must always cut the pavers away from the surface area of the paver field when cutting wet, due to the fact that the pavers will develop a slurry that will stain the paver surface.
The brick saw operator needs to constantly wear the correct defense that is required for operating a saw, such as eye, ear, breathing and hand security ).
Edging types
Edge restraints play a significant role in the overall success of an interlocking pavement installation Edging restraints remove lateral movement of the pavers and hold the pavers securely together. Particularly at the outer border of the paver application, without an edging restraint, your project is ensured to fail with time.
There are a number of different edging restraints from which specialists can choose. Normally produced edge restraints are the most frequently utilized by contractors. Produced edging restraints can range from, plastic edging, steel and aluminum, woods or precast concrete and stone. An edging type that is used mostly in commercial and commercial applications is poured-in-place concrete curbs. This edging restraint is generally set up by other professionals.
Edging installation.
This might result in the migration of the bedding sand and eventual lateral motion of the pavers. If there is a possibility of losing bedding sand between the pavers and the edge restraint, then geo textile material is recommended. When a gap in between the pavers and the edging exceeds 3/8" (10mm), then the space must be filled with cut pavers.
Compaction of brick pavers.
After installation, the pavers need to be compacted. The whole location that is to be compacted must be swept tidy of any foreign objects and debris that can trigger scratching or scuffing on the surface of the pavers.
It is very important to have a compactor that can apply between 3000lbs. And 5000 lbs. Of centrifugal compaction force. In addition, it is very important that the very first compaction takes place prior to any jointing sand has actually been applied to the pavers. If jointing sand is applied to the pavers before compaction occurs, this can trigger a bridging issue and will not allow the joints to be totally filled with jointing sand. This can likewise prevent the pavers from being correctly set into the bed linen sand.
When compacting the pavers, it is suggested that you make a minimum of 2 passes in different directions across the pavers. This will enable the pavers to be effectively set in the bedding sand and will force the bedding sand up into the joints from the bottom of the pavers.
The compaction of the pavers is extremely important to the final performance of the pavers. Failure to do proper compaction can result in contortions and pavement failure with time.
Paver pallets/bundles need to be placed in a manner not to interfere with the paver installation. One of the most commonly utilized approaches for the installation of pavers is hand installation of each paver. The operator of the brick saw need to always cut the pavers away from the surface area of the paver field when cutting damp, due to the reality that the pavers will develop a slurry that will stain the paver surface. Edging restraints eliminate lateral motion of the pavers and hold the pavers securely together. When a gap in between the pavers and the edging goes beyond 3/8" (10mm), then the area should be filled with cut pavers.